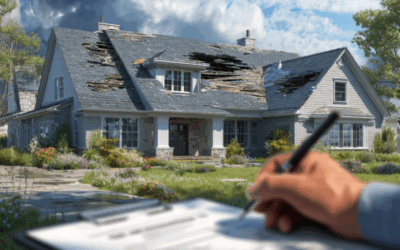
Experiencing a severe storm in Houston can be unsettling, especially when it leaves your damaged roof battered and exposed. The immediate aftermath can feel overwhelming, but filing a roof damage insurance claim doesn’t have to be. This guide will walk you through each step—from securing your property to getting your new roof replacement installed—so you can navigate the process with confidence and clarity.
If you need professional help assessing or repairing storm damage, consider working with a trusted Houston roofing company like Shield Roofers. Their licensed team specializes in roof inspections, insurance claim support, and high-quality repairs after severe weather, including water damage and storm-related leaks.
Quick Steps to File a Roof Damage Claim in Houston
- Document all damage — take photos and videos of your damaged roof and property.
- Contact your insurance company — file the claim promptly online or by phone.
- Wait for the adjuster’s inspection before making permanent repairs.
- Have your roofing contractor present during the inspection. If you haven’t chosen one yet, Shield Roofers can assist with professional assessments.
- Compare multiple estimates from licensed Houston roofers.
- Negotiate if needed to ensure the payout covers all necessary repairs or roof replacement.
- Complete repairs and submit final invoices for your remaining payment.
1. Document All Damages – Secure Your Property and Document the Damage Immediately
The moments right after a storm are critical. Your priority shifts from weathering the storm to protecting your home from further harm and gathering crucial evidence. This isn’t just about insurance; it’s about peace of mind and long-term roof maintenance.
Prioritize Safety First
Before you even think about assessing damage, ensure your immediate surroundings are safe. After major weather events like Houston’s frequent wind, hail, or heavy rainstorms, hazards can linger. Are there downed power lines? Is your roof leak actively dripping near electrical wiring or outlets? If so, stay clear and contact emergency services if necessary.
Once the immediate danger has passed, focus on preventing secondary damage through temporary repairs. This might include placing tarps over damaged sections of your roof, sealing small leaks with waterproof materials, covering broken windows, or moving furniture and valuables away from active water intrusion. These temporary actions not only protect your property from water damage but also demonstrate to your insurer that you’ve taken reasonable steps to mitigate further loss—a key aspect of your homeowner’s policy.
Document Everything: Photos, Videos, and Notes
This is where you become a detective for your own property. Before anything changes, pull out your phone or camera and document every single piece of damage. Think of your photos and videos as the undisputed testimony of the storm’s impact on your damaged roof.
Angles and Proximity: Take wide shots that show the overall damage to your roof and house, then zoom in for close-ups of missing shingles, punctures, lifted edges, and granular loss. Don’t forget to photograph any interior water damage caused by leaks—water stains on ceilings, damaged drywall, or ruined flooring.
Context is Key: Include identifiable landmarks in your photos, like your house number or a unique architectural feature, to confirm the location. If possible, take photos of debris on your lawn that clearly came from your roof.
Time and Date Stamp: Most modern phones automatically add a date and time stamp to photos, but double-check. This verifiable timeline is invaluable.
Detailed Notes: Beyond visuals, write down everything you observe. When did the storm occur? What specific parts of the roof were affected? Did you hear any unusual noises during the storm? Note the exact location of interior leaks. This meticulous record-keeping provides a narrative to accompany your visual evidence.
The more comprehensive your documentation, the stronger your initial claim will be, leaving less room for dispute later on.
2. Contact your Insurance Company & Review Your Homeowner’s Insurance Policy
Before you even pick up the phone to call your insurance company, take a deep dive into your homeowner’s policy. This document is your rulebook, and understanding its intricacies will empower you throughout the claims process.
Understand Your Coverage: Deductibles, Exclusions, and Deadlines
Every policy is a unique contract, and knowing yours inside and out is crucial.
Deductibles: This is the amount you’re responsible for paying out-of-pocket before your insurance coverage kicks in. For roof damage, especially storm-related, you might encounter specific wind/hail deductibles (often 1% or 2% of your dwelling coverage) that differ from your standard deductible. Knowing this number upfront helps you manage expectations for your financial contribution.
Types of Coverage: Most policies offer either Actual Cash Value (ACV) or Replacement Cost Value (RCV) for your roof.
- ACV pays for the depreciated value of your damaged roof at the time of damage.
- RCV covers the cost to replace your roof with new materials of similar quality, without deduction for depreciation. This is generally the more favorable coverage. However, often the initial payout is ACV, with the depreciation held back until repairs are completed and invoices are submitted. Understand which type of coverage you have and how it applies to your roof.
Exclusions: Be aware of what your policy doesn’t cover. For example, water damage from floods (which requires separate flood insurance) or neglect is typically excluded.
Deadlines: Your policy will specify a timeframe within which you must report damage. Missing this deadline could jeopardize your claim. Act promptly.
3. Wait for the Adjuster’s Inspection
Getting a Claim Number and Adjuster Assignment
Before you hang up, ensure you receive a claim number. This is your unique identifier for all future communications. Write it down immediately and keep it handy. You’ll also be informed that an insurance adjuster will be assigned to your case. They should provide the adjuster’s name and contact information, or at least tell you when to expect contact from them. This claim number is your golden ticket—don’t lose it.
4. Have your Roofing Contractor Present
The adjuster is your insurance company’s representative tasked with evaluating your damage. Their visit is a critical juncture in the claims process.
Being Present and Prepared for the Inspection
Always, always be present when the adjuster inspects your property. This is your opportunity to point out damage, ask questions, and ensure nothing is overlooked.
Clear the Path: Make sure there’s clear, safe access to your roof and any affected areas inside your home.
Your Preparedness Kit: Have all your documentation ready:
- Your detailed notes about the storm and damage.
- Your organized photos and videos (perhaps on a tablet or printed out if you prefer).
- A copy of your insurance policy, particularly the sections on deductibles and roof coverage.
Walk Them Through: As the adjuster inspects, walk with them. Politely point out all the damage you’ve documented. Don’t be shy; you know your home best. If they miss something, bring it to their attention. Ask them to explain what they are looking for and how they are assessing the damage.
Providing Your Documentation to the Adjuster
Offer your collected photos, videos, and notes to the adjuster. Many adjusters can accept digital files on the spot. This isn’t just a formality; it’s a powerful reinforcement of your initial report. Your detailed evidence will either corroborate their findings or provide a counterpoint if their initial assessment differs. It establishes your credibility and thoroughness from the outset.
5. Compare Multiple Estimates from Reputable Roofing Contractors
While the adjuster’s report is important, it’s equally crucial to get independent assessments of the repair costs. This ensures you have a comprehensive understanding of what it will take to restore your roof.
Why Multiple Estimates are Crucial
Don’t settle for just one estimate, and certainly don’t rely solely on the insurance adjuster’s figures.
Accuracy and Completeness: Different contractors might identify different aspects of damage or propose different solutions. Multiple estimates provide a broader view of the necessary repairs and a more accurate average cost.
Competitive Pricing: Contractors know you’re getting other bids, which encourages fair and competitive pricing.
Expert Eye: Reputable local contractors are intimately familiar with local building codes, materials, and common storm damage in Houston. They can often spot subtle damage that an adjuster, who might be from out of town, could overlook.
Aim for at least two, preferably three, estimates from licensed, insured, and reputable roofing contractors in the Houston area.
Ensuring Estimates Include All Necessary Repairs
When reviewing contractor estimates, make sure they are incredibly detailed.
Scope of Work: The estimate should clearly outline every single item of work, from tear-off to disposal, shingle replacement (type and brand), underlayment, flashing, ventilation, and any necessary decking repairs.
Building Code Compliance: Houston has specific building codes. Ensure the estimate includes upgrading your roof to current code requirements if necessary. Insurance companies are generally obligated to cover these code upgrades.
Materials and Quality: The estimate should specify the brand and type of materials to be used. Ensure they are comparable in quality to your existing roof or better.
Itemized Costs: A good estimate will break down costs for labor, materials, permits, and any other associated fees.
Warranty Information: Inquire about the contractor’s warranty on labor and materials and ask about ongoing roof maintenance options to extend your roof’s lifespan after repairs.
Compare these estimates carefully. They will form the basis of your negotiation with the insurance company if their initial offer falls short.
6. Negotiating with Your Insurance Company (If Necessary)
It’s common for the initial settlement offer from an insurance company to be lower than the actual cost of repairs. This isn’t necessarily malice, but it’s where your preparation truly pays off.
After their visit, the adjuster will submit a report and your insurance company will issue an initial settlement offer. Review this document meticulously and compare it against your contractor’s roof replacement estimate to ensure all water damage and code upgrades are properly included.
7. Completing Roof Repairs and Finalizing the Claim
Once you’ve reached an agreeable settlement, the focus shifts to getting your roof repaired and officially closing out your claim.
Choosing Your Contractor and Scheduling Repairs
With the insurance funds secured, select the reputable contractor you’ve chosen. Review their contract thoroughly, ensuring it matches the agreed-upon scope of work and pricing. Discuss the timeline for repairs, material delivery, and any logistical considerations. A good contractor will keep you informed every step of the way and may recommend ongoing roof maintenance after your roof replacement to prevent future storm issues.
Final Payout and Closing the Claim
The insurance company typically issues payments in installments. The first payment (often the ACV portion, minus your deductible) is usually sent after the initial agreement. Once the repairs are completed, your contractor will provide you with a final invoice. Submit this invoice to your insurance company. If you have RCV coverage, this is when they will release the depreciation holdback, paying the remainder of the total approved cost.
After the final payment is received and you are satisfied with the repairs, the claim will be officially closed. Remember to keep all documentation related to the claim, including communication, estimates, invoices, and payment records, for your personal files.
Filing a roof damage claim can be complex, but by following these steps, you empower yourself to navigate the process effectively, protect your investment, and restore your home to its rightful condition after a Houston storm.